taking some time today to discuss xiao! specifically the upgrades i made to him for metrocon 2023. i did so much experimenting with new techniques and materials, so i wanted to share that here to document, and maybe inspire some of my fellow artists/cosplayers!
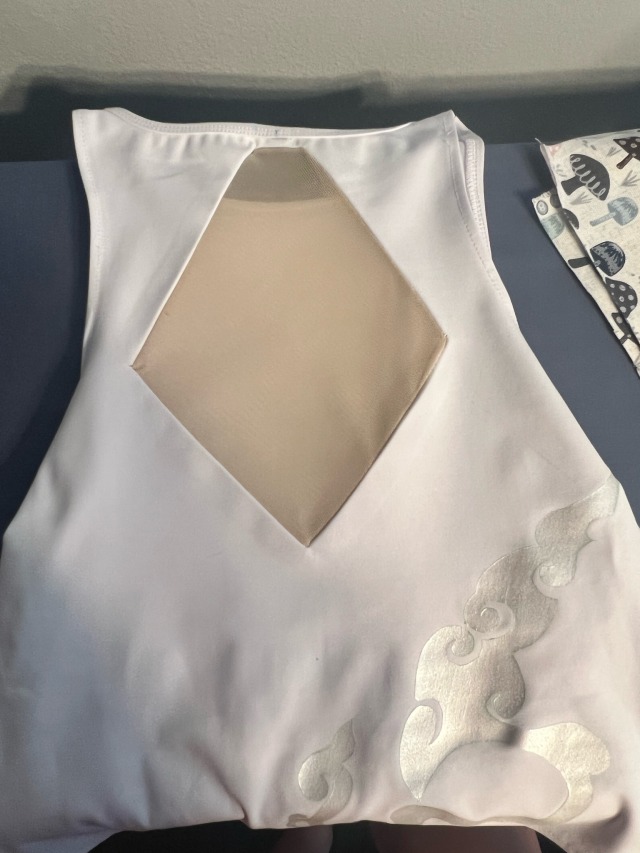
i don’t think i could ever properly explain how happy i was after remaking xiao’s shirt. the previous version (which was purchased) fit really poorly, and the fabric was not great. it constantly pulled out from the waist of the pants and it practically blocked any airflow. the solution was simple: remake it from a bodysuit. that way the shirt not only stayed in place but also already gave me a much better form-fitting base to start out with. the mesh panel in the back was the part i worried about the most but ended up being the part i’m happiest with! i used power mesh that i hand dyed to be close to my skin tone (though the color isn’t very clear due to my binder’s color).
the swirling pattern on the bodysuit is a metallic white fabric paint. i made a digital drawing of the pattern on procreate, then printed it onto freezer paper. after cutting it out with an exacto knife, you can actually iron freezer paper onto fabric (shiny side facing the fabric) and it creates a nearly seamless stencil for fabric paint! i see myself using this technique a lot in the future, it’s literally perfect!!
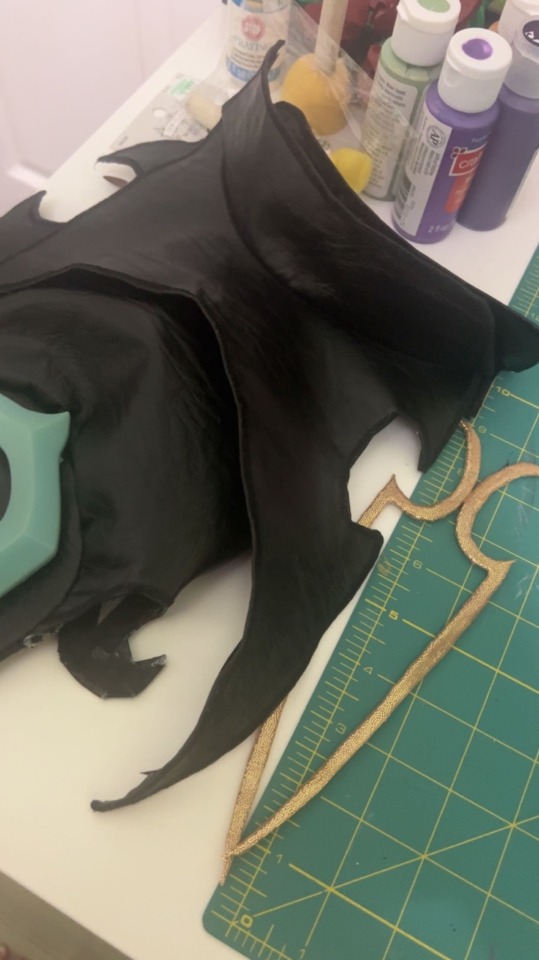
the black leather piece at the neck and shoulders was my biggest obstacle. not only have i never worked with leather, but it is also a non-stretch material i’d be attaching to the collar/neck portion that very much needed to be able to stretch to be pulled on. thankfully the design worked out that i could have 2 closure points, one on the back of the neck and one at the front of the neck. the entire piece is hemmed by folding over and gluing the raw edge to the inside, then i glued hem tape over those raw edges to cover them and make them softer on the skin (the entire leather piece is unlined, due to its complex shape). all the visible edges of the leather were satin stitched to give them a clean, crisp edge. the gold appliqués on the front and back are 2mm eva foam covered in a gold stretch fabric, then glued onto the bodysuit with e6000!
the two white pieces that frame the mesh panel on the back gave me more difficulty than i expected. their shape is a bit deceiving, and needing them to lie flat on my back without sacrificing the stretch of the main garment meant i couldn’t just top stitch them onto the back. and while i’m not super happy with how they ended up aligning (where they meet at the top is much further down than i was aiming for), i still think it came out really nice!
and that’s the finished top!
here’s a front and back of the finished top! the sleeve is held up with clear bra straps that hook onto the inside of the shirt at the shoulder. all in all, i absolutely love how this newer shirt came out.
besides the shirt/bodysuit, the boots also got an upgrade! i snagged some boots on sale on amazon for $20, which was an insane steal! this style is very universal for so many costumes, and it also helps that the boots are comfortable and flat too! all of the accessories on the boots are affixed temporarily or from the inside (velcro, snaps, and elastic) so that the integrity of the outer boot remains untouched and i can reuse them for several costumes and even everyday wear. i also replaced the gold piece around the neck that holds the “scarf.” just like the pieces on the shirt, it is 2mm foam covered in gold fabric. this not only helps the gold elements feel more cohesive but also lies a lot more comfortably on my neck!


